How to Capture Frames from a Video Without Black Screens, in Batches
You need stills from a video: for a blog post, a slide, a thumbnail, a report. The usual routine is open a player, scrub, pause, Print Screen, crop, paste, save, repeat. Half the captures are blurred, the player’s controls sneak into the frame, and every few shots you land on a black transition. There is a faster way: read the frames straight from the file.
Why a screen grab is the wrong tool
- Wrong resolution: a 4K video in a window gives a window-sized picture.
- Contamination: progress bars, subtitle overlays and the cursor creep in.
- Scaling artefacts: the player has already resized and filtered the frame.
- Wrong shape: DVD footage and portrait phone videos often come out stretched or sideways.
Video Snapshots Genius decodes each frame directly from the file at the original resolution, corrects the pixel aspect ratio and the rotation, and resizes only when you save.
Capture in four steps
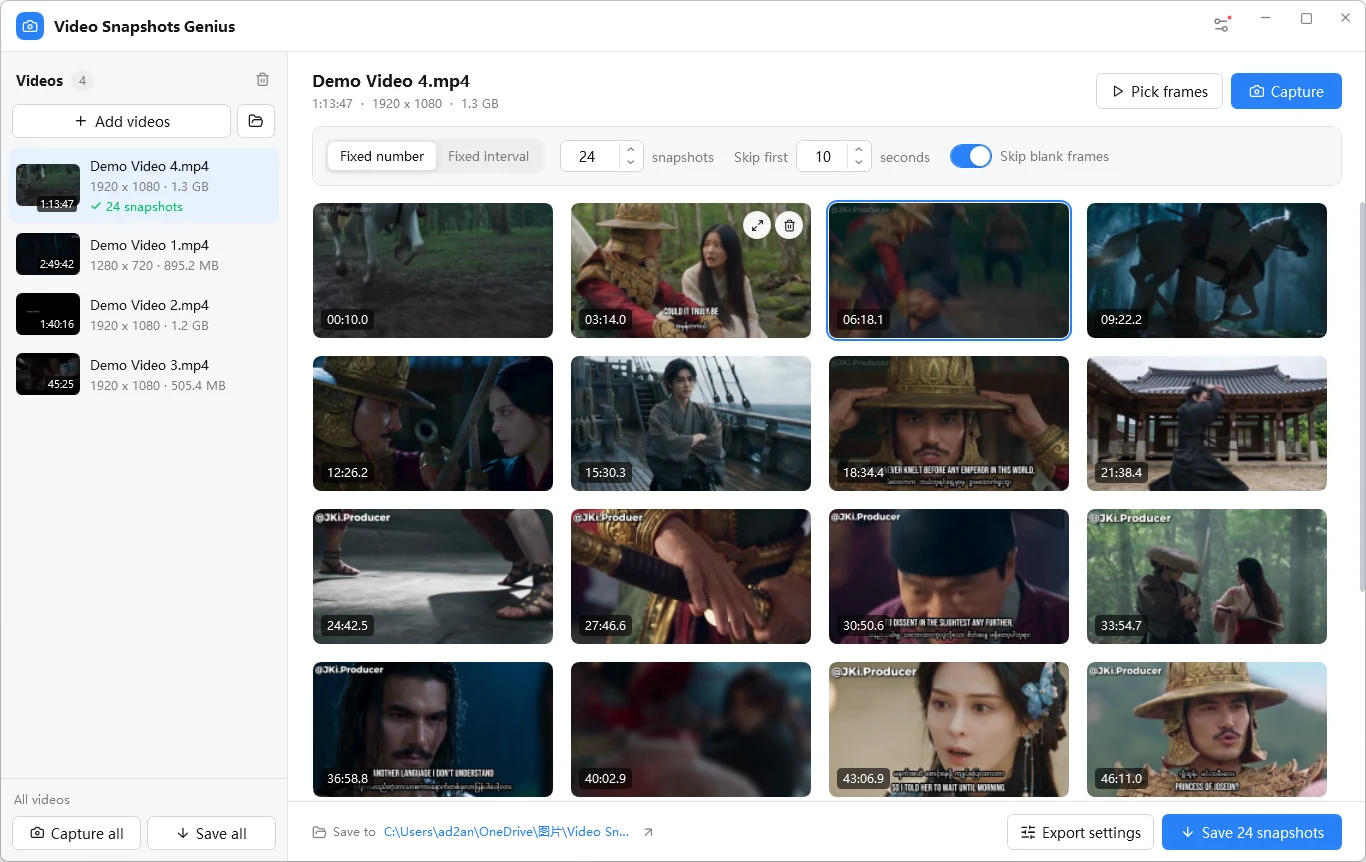
- Add: drag in video files or a folder (Ctrl+O also works).
- Capture: pick Fixed number (for example 24 shots spread over the whole video) or Fixed interval (one shot every 60 seconds, good for lectures and long recordings). Skip first jumps past titles and logos; the default is 10 seconds. Press Capture, or Capture all for the whole list.
- Refine: remove shots you do not like, add exact frames with Pick frames, and double-click a snapshot to adjust, annotate or crop it.
- Save: choose size, format and an optional watermark in Export settings, then Save or Save all. Each video gets its own folder.
No more black screens
With Skip blank frames on (the default), each automatic capture is checked, and a frame that is about 98% one colour is dropped: a cut to black, a white flash, a solid title card. Dark night scenes with content stay. In Fixed number mode a blank shot is replaced by the nearest usable frame, so 24 still means 24, and the label always shows the real time. Fixed interval mode keeps the spacing strict and simply leaves blanks out.
When the exact frame matters
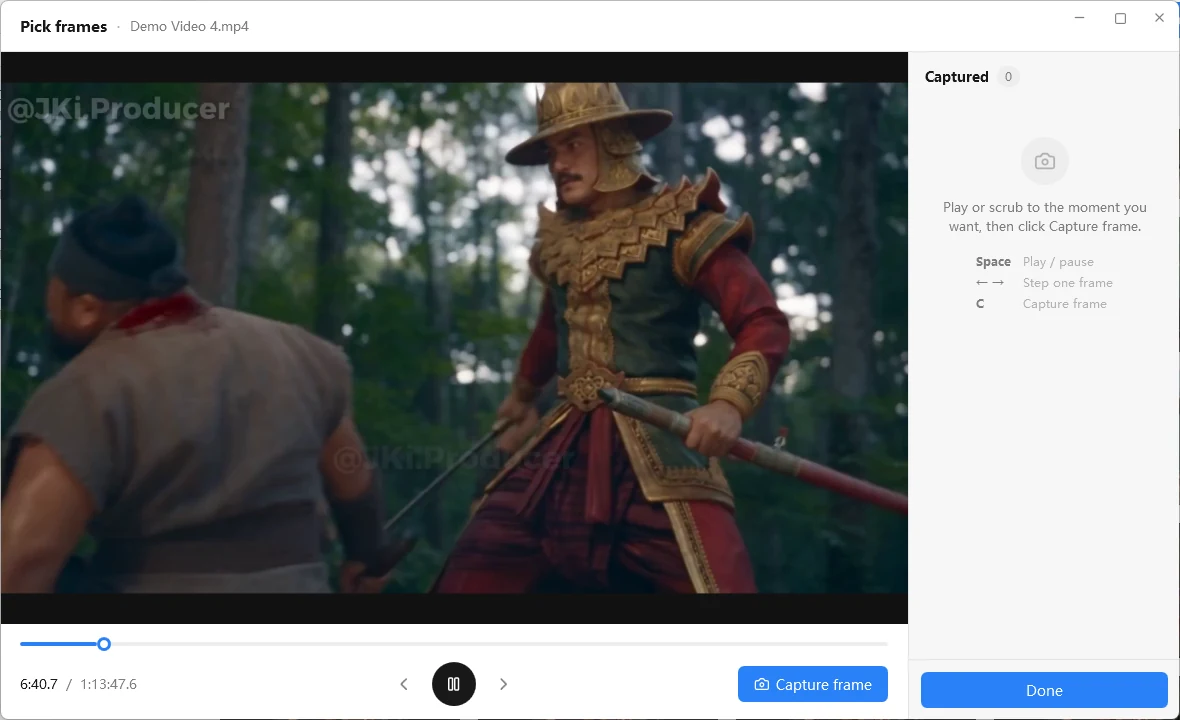
Open Pick frames: Space plays or pauses, the left and right arrows step one frame, and C captures. Hand-picked frames join the set, sorted by time, and are never filtered. One thing to remember: pressing Capture again replaces the whole set, so Capture first and Pick frames afterwards.
Export what you need
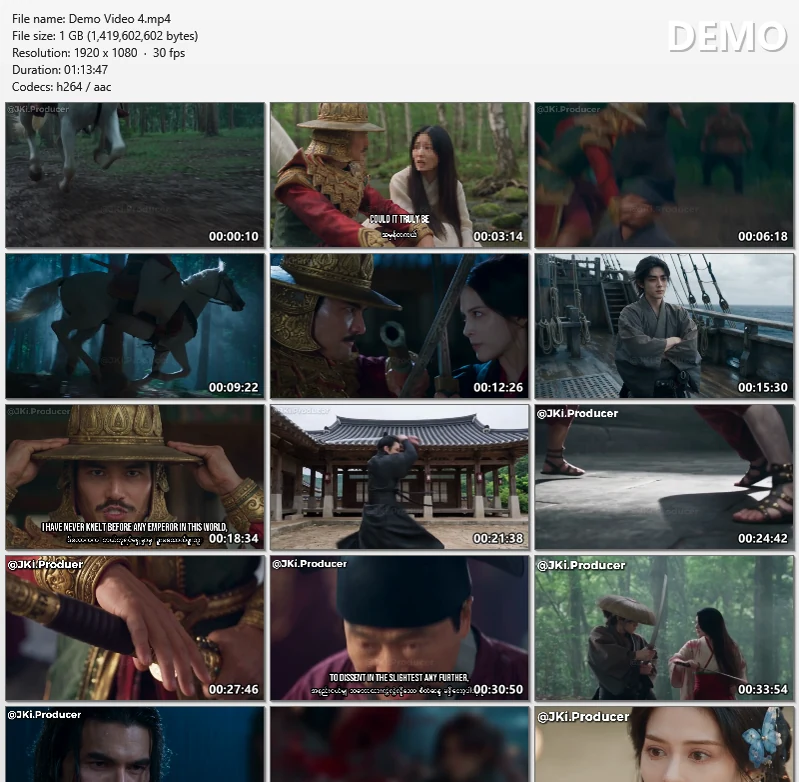
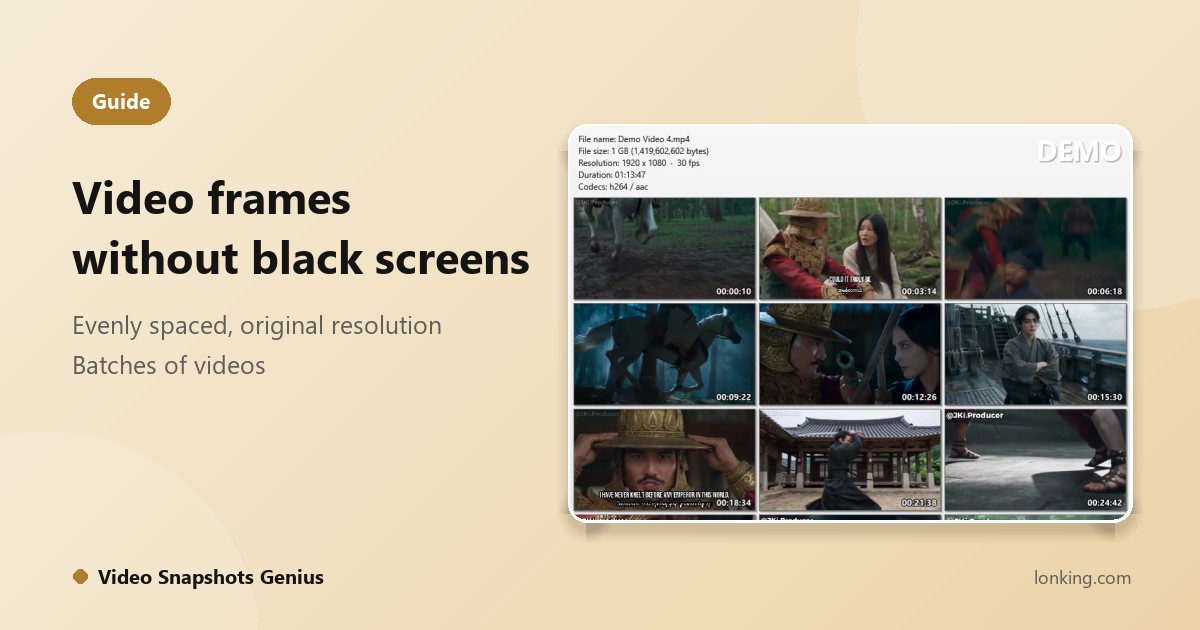
Save JPG, PNG or BMP at the size you choose, with a timestamp, text or logo watermark. Turn on Animated GIF for a looping preview, and Contact sheet for an overview of the whole video with a header showing the file name, size, resolution, frame rate, duration and codecs.