How to Batch Resize Images on Windows 11 and 10: Free and Paid Ways Compared
Resizing one photo in Windows takes seconds. Resizing 300 takes an afternoon unless you use a batch tool. Here are the realistic options on Windows 11 and Windows 10, what each one is good for, and how to resize a whole folder in one pass.
Option 1: Photos and Paint (one picture at a time)
The Photos app on Windows 11 has a Resize image command in its menu, and Paint has Resize and Skew. Both work on a single picture at a time, so they suit a one-off email attachment, not a folder.
Option 2: Microsoft PowerToys Image Resizer (free, basic batches)
PowerToys is a free Microsoft utility pack. Once installed, select several pictures in File Explorer, right-click and choose Resize pictures. You pick a preset (small, medium, large, phone) or a custom size and it writes resized copies. It is a good free answer for simple jobs. It is deliberately simple: there is no watermarking and no preview of the result or its file size, so you find out about problems after the batch has run.
Option 3: Picture Resize Genius (batches with a live preview)
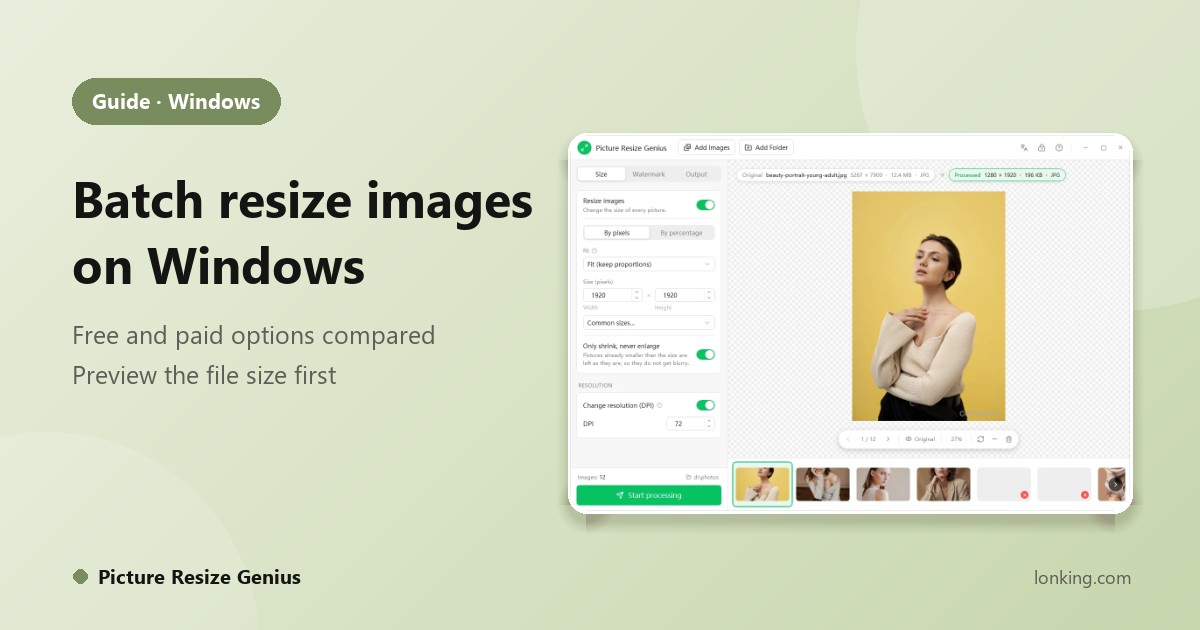
Picture Resize Genius is built for batches. You set the rules once, see the real result, then process the folder.
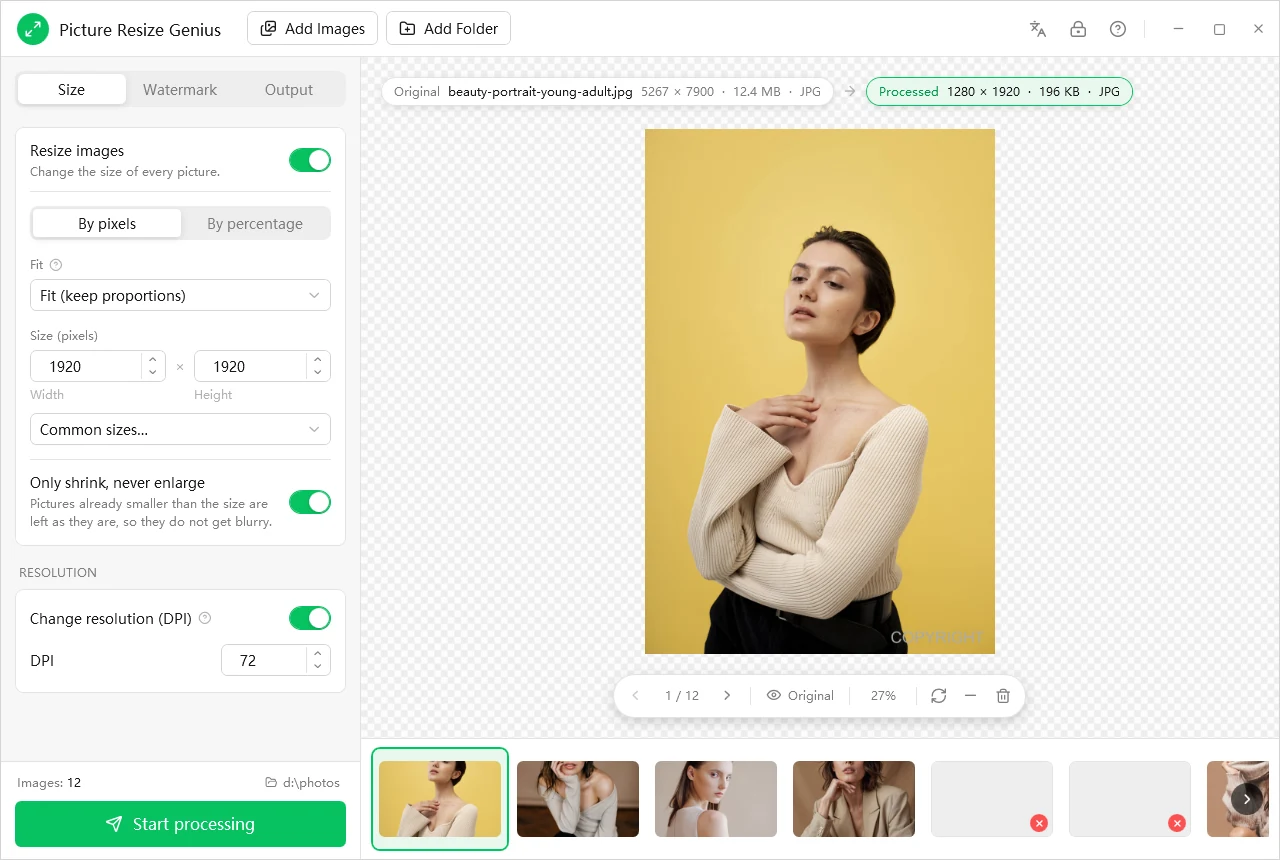
- Add the pictures. Click Add Folder or drag files and folders in. It reads 150+ formats including JPG, PNG, WebP, HEIC and camera RAW.
- Choose the size. On the Size tab turn on Resize images and enter pixels or a percentage. Pick a fit mode: Fit keeps proportions, Fill and Crop produce an exact shape such as 800 x 800.
- Keep small pictures sharp. Only shrink, never enlarge is on by default, so a picture already smaller than the target is left alone.
- Pick format and quality. Watch the estimated file size in the preview as you move the quality slider.
- Click Start processing. Results are written as new files; your originals are never overwritten.
The same window can also add a text or logo watermark, rename the files in sequence and remove location and camera data. For worked recipes see resizing for a marketplace, your website or email.
Which size for which job?
| Use | Typical setting |
|---|---|
| Marketplace listing | Whatever the marketplace asks for, often a square such as 800 x 800 (Fill or Fit) |
| Website or blog | 1920 pixels wide, Fit, JPEG or WebP |
| A smaller size, around 1024 pixels on the long edge, moderate quality | |
| Thumbnails and avatars | Crop to a square with the anchor on the subject |
These are common starting points, not rules. Always check the destination’s own requirements.
Quick comparison
| Photos / Paint | PowerToys | Picture Resize Genius | |
|---|---|---|---|
| Whole folder at once | No | Yes | Yes |
| Preview with file size | No | No | Yes |
| Watermark | No | No | Yes |
| Rename in sequence | No | Limited | Yes, with a live example |
| Price | Included with Windows | Free | 15-day free trial, then a license |